Yep, I said cake ball turkeys… I gave you a peek at these bad boys earlier today, and now I’m going to show you how I made them.
It all started when I found this picture on Pinterest.

(Source)
Surely I could recreate them. Afterall, I’m a big fan of Bakerella, and had made cake balls many times before. This should be a piece of cake… however, this was one of those darn Pinterest links where there’s only a picture. BUMMER!
So, I took a closer look and figured out what I’d need and came up with the following.
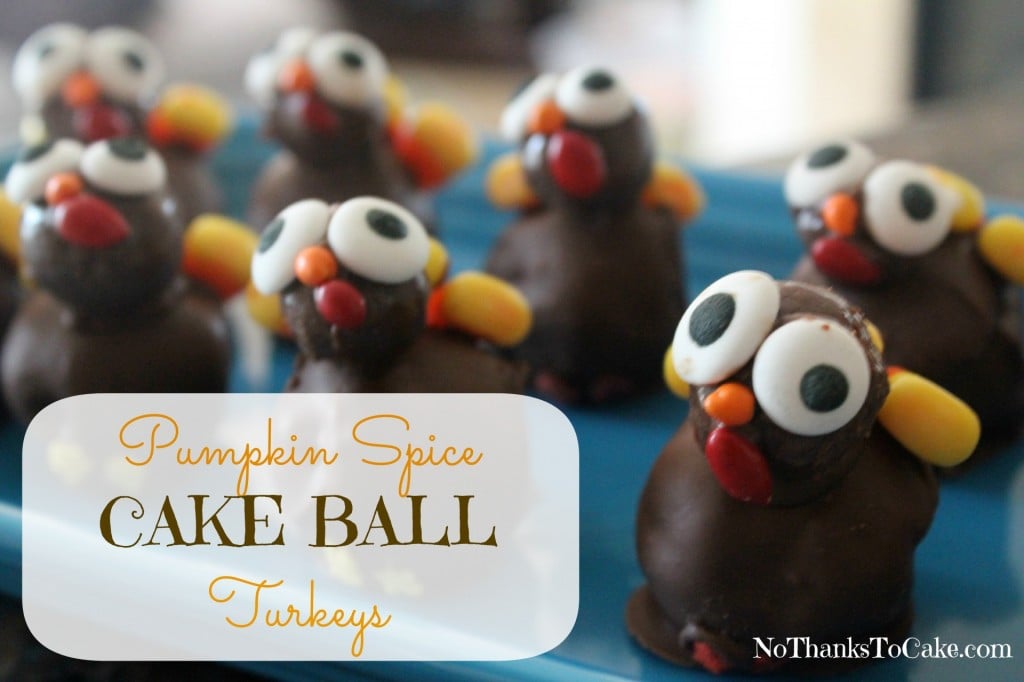
Note: My final project did not look nearly as good as these pictured above… I’m no pro on dipping candy… so you’ll see some bumps, and I left my malt balls in a warm car for two days. Oops! I will tell you that they tasted AMAZING and were a HUGE hit at my Friendsgiving event at Deb’s.
Worth the effort!
Pumpkin Spice Cake Ball Turkeys
Inspired by Pinterest
INGREDIENTS

1 box Spice Cake Mix
1 Diet Soda (I used Diet Sierra Mist)
1/2 cup Canned Pumpkin (not pumpkin pie mix)
1/2 cup Cream Cheese Frosting
INSTRUCTIONS
1. Mix the Spice Cake and Diet Soda in a bowl. Pour into a 9×13 baking pan sprayed with Pam. Bake the cake per the temperature and time recommended on the back of the box. Remove cake to a cooling rack once tester comes out clean.
2. Remove cake from the baking pan and into a large bowl. Crumble the cake.

3. Add pumpkin and cream cheese frosting. Stir completely until well-blended, and move to the refrigerator for 30 minutes.

Usually cake balls just call for frosting… I decided to mix it up!

3. Roll cake mixture into balls, which will serve as the body of the turkeys. Place these on a dry cookie sheet until ready to dip. Once all of the balls have been rolled, move them to the refrigerator until you are ready to dip them.

4. Assemble all of your decorating items. Here’s what I used (and where I found them):

Candy Eyes (Hobby Lobby)
Miniature Rainbow Chips (Michael’s)
Candy-Covered Sunflower Seeds (Cake Decorating Shop)
Leaf-shaped Sprinkles (Target)
Malt Balls and Candy Corn (Local Candy Shop)
Milk Chocolate Candy Coating (Hobby Lobby)

5. Melt several chips of chocolate in a small bowl, per the package instructions. Note: I use the microwave, and simply set it for 30 seconds. Stir well, and then put it back in for 15-20 seconds and stir again.

Melted chocolate will serve as “glue” when assembling your turkeys. Find a good toothpick to use to apply it.
6. Assemble your turkey heads first. Take a malt ball and apply chocolate to it in a straight line. Apply the eyes. Add more chocolate where the nose should be, and adhere an orange mini chip for the beak. Lastly, use a drop of chocolate to apply the gobble (red sunflower seed.)
Note: I left my malt balls in the car on a warm day in Denver… that’s why they look a little bumpy. Yours should be much prettier!!


7. Now, it’s time to dip the cake balls. Remove the balls you’ve rolled from the refrigerator. In a larger, deeper bowl, place several chocolate disks and melt them in the microwave per the package instructions. Note: I use the 30 seconds, stir, 30 seconds, stir melting technique here.
8. Drop a cake ball into the chocolate. Use a spoon to cover it well. Remove to wax paper. Repeat!


9. While the chocolate is still a little bit wet, take the opportunity to add the turkey head to its body. You’ll need to hold the malt ball in place for a few seconds until it adheres.

10. Add the feet (colored leaf sprinkles.) You’ll need two for each turkey and use your toothpick to apply the chocolate (as glue) and then press the leaves in place. I recommend adding the feet to all of the turkeys at once.

11. Next, it’s time to add the feathers. This is probably the hardest part. Turn your turkey around, and apply chocolate to its back where the feathers will go. Add 2-3 candy corns to the chocolate (glue) and hold until it begins to harden.


12. You’re DONE! Phew!


[…] Click here for the recipe. […]